FOR MAC SETUP INSTRUCTIONS, CLICK HERE
Step 1: Add details to Broadcast Settings
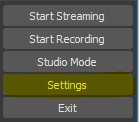
Open the settings of OBS Studio.
 Go to the “Stream” tab. Select “Custom Streaming Server”. You should see 2 fields: URL and Stream key. You will need to go to your FuneralScreen Account Dashboard to fill out this information.
Go to your OBS Channel, Encoder Setup section and select “Other RMTP Encoder”.
Fill in “URL” and “Stream Key” with the Stream URL and Stream Name, respectively.
Then click on “Use authentication” and fill in “Username” and “Password” using the Login and Password of the live channel.
Step 2: Add audio, video sources
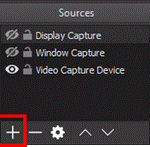 At this point, you are set up to broadcast with OBS to your LiveStream by FuneralScreen stream. From here, you can add multiples sources (camera, audio, display capture, etc.) by clicking the “+” button in the “Source” (bottom of the screen) and remove them by clicking the “-“.
You can also add (“+”) and remove (“-“) “Scenes”. Scenes are preset sources than you can mix together. Later, you can also assign hotkeys to switch between the multiple Scenes you’d have created. To do so, go to the “Hotkeys” tag of OBS’s “Preferences”.
Before starting the stream, make sure all the following settings match the picture below.
Keyframe interval = 2 seconds and nothing else, rate control = CBR, profile = baseline.
Step 3: Add audio, video sources
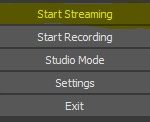
Once you are happy with your OBS Studio settings, click on Start streaming.
This guide relates to the Mac version of the Encoder (Windows version available here).
Step 1: Add details to Broadcast Setting
Open the settings of OBS Studio.
Go to the “Stream” tab. Select “Custom Streaming Server”. You should see 2 fields: URL and Stream Key. You will need to go to your LiveStream by FuneralScreen account information for your scheduled stream to fill out this information.
Go to your LiveStream Account Dashboar, Scheduled Live Stream Settings section and select “Other RMTP Encoder”.
Fill in “URL” and “Stream Key” with your Stream URL and Stream Name, respectively.
Then click on “Use authentication” and fill in “Username” and “Password” using the Login and Password of the live channel.
Step 2: Add audio, video sources
At this point, you are set up to broadcast with OBS to LiveStream by FuneralScreen. From here, you can add multiples sources (camera, audio, display capture, etc.) by clicking the “+” button in the “Source” (bottom of the screen) and remove them by clicking the “-“.
You can also add (“+”) and remove (“-“) “Scenes”. Scenes are preset sources than you can mix together. Later, you can also assign hotkeys to switch between the multiple Scenes you’d have created. To do so, go to the “Hotkeys” tag of OBS’s “Preferences”.
Before starting the stream, make sure all the following settings match the picture below.
Keyframe interval = 2 seconds and nothing else , rate control = CBR, profile = baseline.
Step 2: Add audio, video sources
Once you are happy with your OBS Studio settings, click on Start streaming.